Running your App in the Android Emulator
Running your App in the Android Emulator
The Android Emulator is essentially a virtual Android device that runs on your computer. You can use it as an alternative to running your app on a physical device.
The steps below will guide you on how to set up and run the emulator.
- Click Run
- In Android Studio to run an app in the emulator you can simply click the Run icon in the toolbar or you can go to Run -> Run ‘app’ in the menu bar.
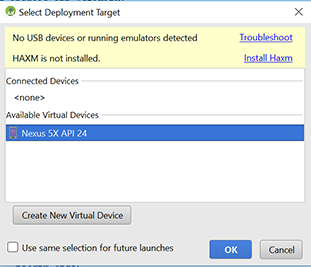
- The Select Deployment Target dialog box will appear as shown in the figure.
- Create New Virtual Device
- Click on the “Create New Virtual Device” button in the Select Deployment Target dialog box.
- Download a system image. Choose the image that you prefer from the Select a system image screen. I downloaded the Nougat system image.
- Follow the prompts that will appear.
- Select Deployment Target
- Select a device in the Select Deployment Target dialog box and click OK. Your app will then open up in the emulator as shown in the figure.

I> During the process of setting up the emulator, Android Studio might prompt you to download certain recommended programs. HAXM (Intel Hardware Accelerated Execution Manager) or KVM (Kernel-based Virtual Machine) are examples of this. HAXM and KVM use hardware acceleration to improve the performance of your emulator.